Our new pantry and desk
One of the deficiencies of our house is that it doesn't have enough storage space. Our kitchen doesn't have a pantry, so we used to keep extra food in an upstairs closet.
This is the wall next to our kitchen table. It is the area where we keep our computer.
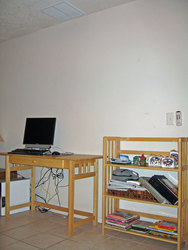 Before
Scott had the idea to install cabinets and a desk on the wall to give us more storage space. We ordered the cabinet pieces through Home Depot. We ended up ordering nicer cabinets than the rest of the kitchen. However, they match pretty well.
The cabinets arrived on Tiffany's birthday.
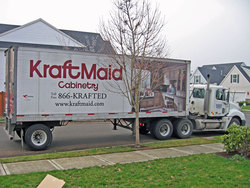 The delivery
The first day, the pieces remained loose in our kitchen so we could have time to celebrate Tiffany's birthday.
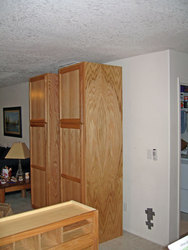 In pieces
Within a few days, the major pieces were mounted in place. Scott had to re-route electrical wires, ethernet cables and the cables for the weather station. Once the big pantry units were attached to the wall we started using them to store food. Scott spent many of his evenings and Saturdays working on the project.
Scott mounted an old desk top temporarily so that we could use the computer while the laminate counter top was on order. Once the counter top arrived, Scott spent many hours sanding the back and side edges so that it would be flush against the cabinet and wall. Our wall is very far from flat.
Scott then added molding and wood trim. The project then sat for many months, nearly finished. The main reason it took so long to finish was that Scott wasn't brave enough to cut the crown molding for the top of the cabinets. We bought one piece of crown molding at a price of $55. It was eight feet long and the molding had to cover seven feet, leaving very little room for error.
Finally, at the end of Scott's sabbatical from work, he borrowed a friend's compound miter saw. He also bought a book about crown molding. It was a good thing because he would have never figured out on his own that this particular piece of crown molding needed to be cut with a blade angle of 43.3 degrees and a miter angle of 13.6 degrees.
Once the crown molding was on, Scott did a few other finishing touches such as attaching more oak molding on the side of the cabinets and some white molding against the wall on the back of the desk.
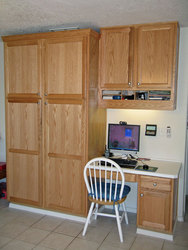
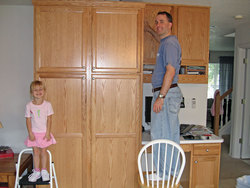 Finishing touches
Here is the finished project!
 After
After